
Welcome to Keith's Workshop
*****************************************************************
The Boulder City Live Steamers
March 8th run day featuring a Mikado live steam locomotive.
It was the Southern Nevada Railroad's Museum open house weekend.
The BCLS ran on both Saturday and Sunday behind this great steamer.
This video may take some time to download.
Please wait.
This is our second movie with more to come all around the tlmrc.org website.
*****************************************************************
Operating on the New Layout 1/21/23
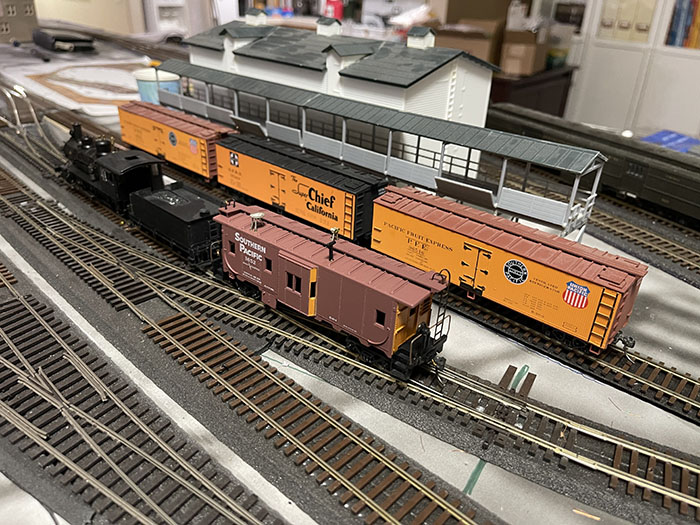
Track and trains on the main and Branch
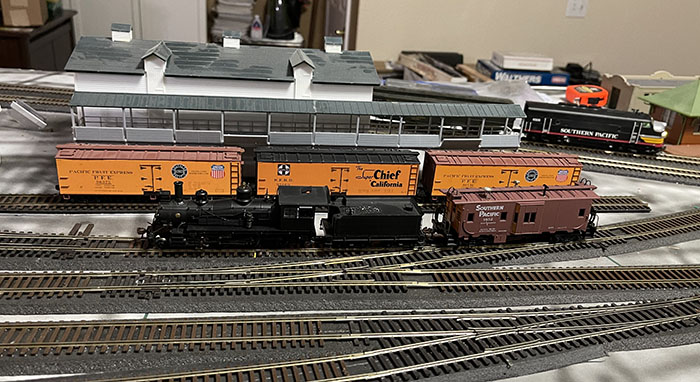
Carefully solving track and wiring issues before adding scenery.
*****************************************************************
Starting the New Layout
6/14/21
Testing the new layout with new turnouts
The Case of the Stuttering Steamer
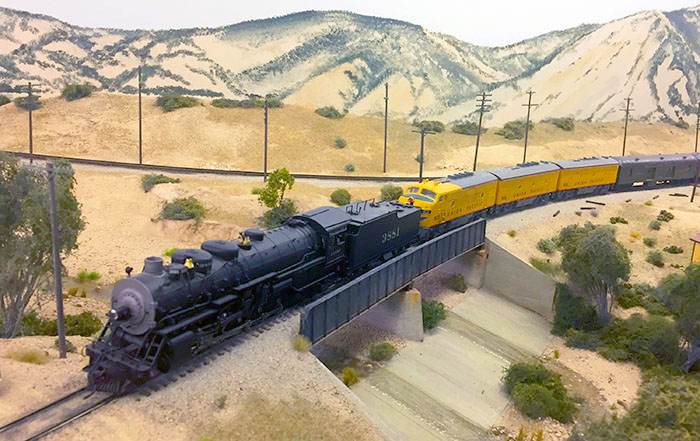
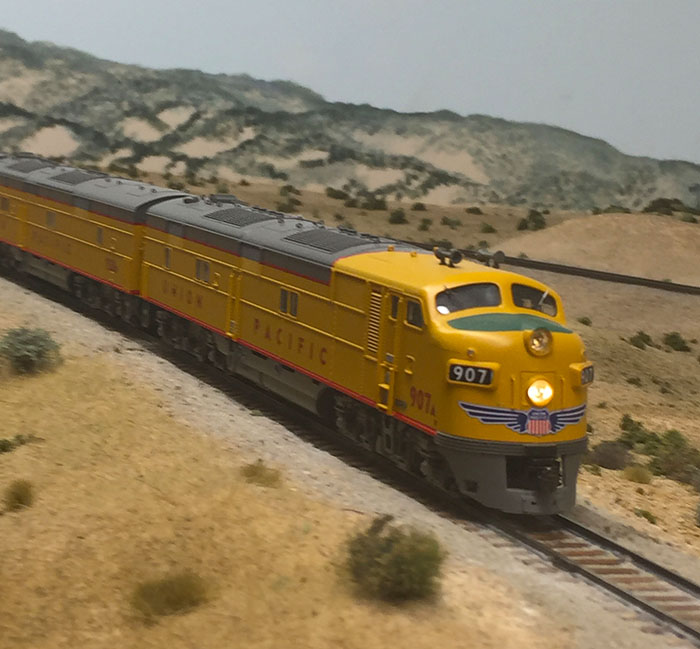
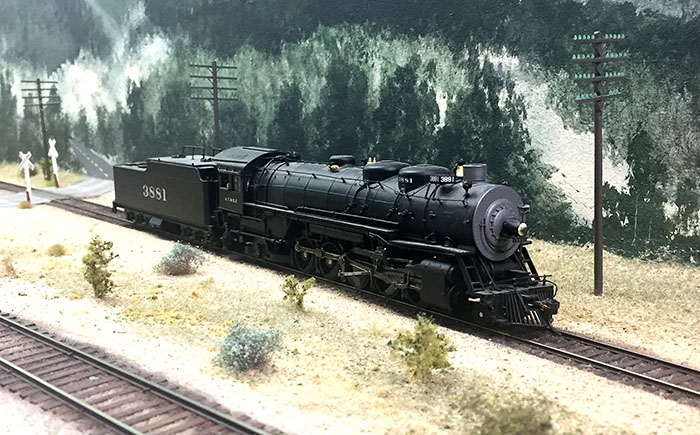
In a concerted effort to thoroughly test the track that has been laid and wired, I have been getting out larger and more elaborate locomotives. An AC-4, cab ahead, an MT-4 mountain and an A-B brace of F3 diesels. Each has been called on to pull a 10-car freight. Each has been up to the task until it starts to enter the fiddle yard. At that point the train stutters, it periodically stops, then starts, runs for a bit and stops. The diesels alone move through without a problem, but the steam engines, running light, can stutter on occasion.
Well, the problem has been answered.
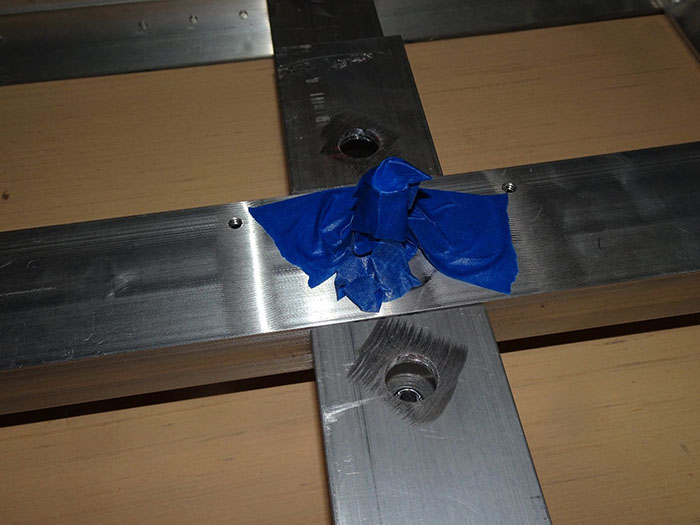
Here is the culprit:
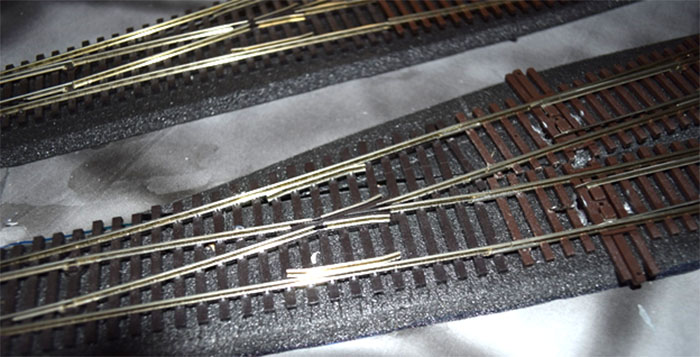
Look what happens when I put a wheel set on this frog.
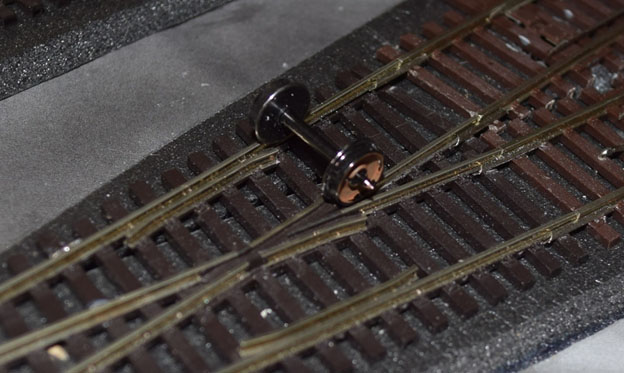
It is still hard to see, but there is a brief moment when the wheel over the frog, touches both live rails. I saw a small spark on occasion when a train was passing. That brief spark was enough to cause the breaker on this power section to trip. When it reset, the wheel was not shorting so the train started up again. Not every car caused this to happen. It was not even repeatable with one or two cars every time. The physics of the train could affect this. Well, these are older Peco track switches. I have ordered two new switches to replace the two that are in this track arrangement, but it will be a while until they arrive and can be installed, so in the mean time I got out the perfect tool to fix this on a temporary basis:
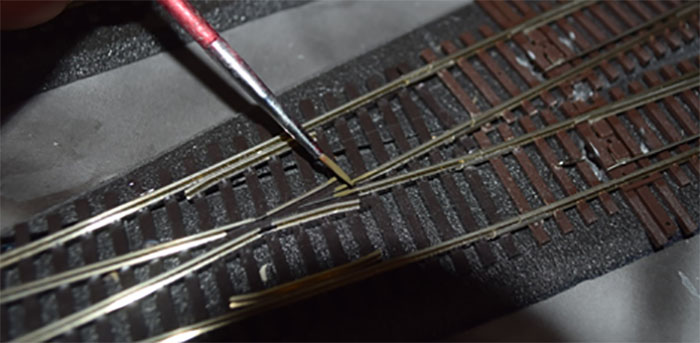
Yep, a paint brush. A little rail brown will act as an insulator on the tops of the rails at the critical point on the frog. I’m sure it will wear over time, but it only has to work for a couple weeks, during which my trains should run smoothly into the fiddle tracks and back out.
When I looked closely at the rails here, I could see minor marks of pitting from sparks. DCC can be unforgiving, give it the respect it deserves. So long from the Corona Valley RR. See you down the track sometime soon.
Starting a New Layout
6/09/21
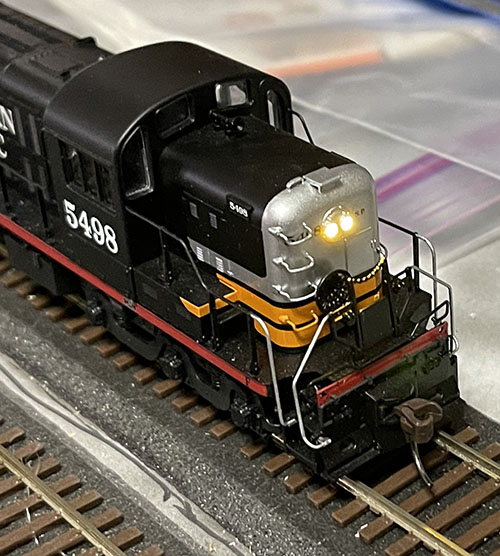
Link to Keith's new switcher (Click Here)
More Progress From 3/9/21 Look Down the Page
Progress on the Corona Branch of the SP 11/18/20
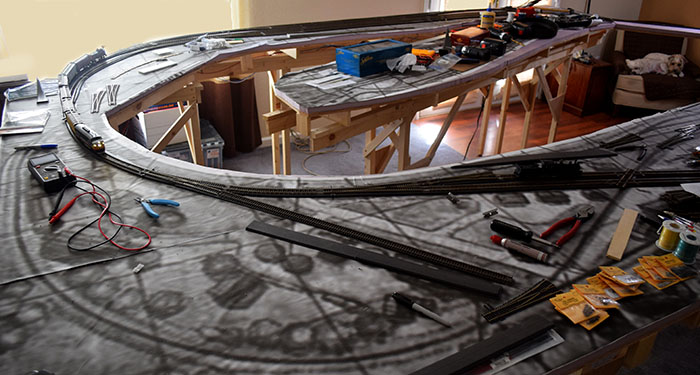
The new Corona Branch of the Southern Pacific is moving along. The basic L-girder is up and I am making cardboard templates for the 1/2 plywood that will be the basic support above the L-girder. The overall layout is 9.5 x 15 feet and is a doughnut with a peninsula as you can see from the pictures. This is based on an Ian Rice design that was in a book of small layouts from Kalmbach a few years ago.
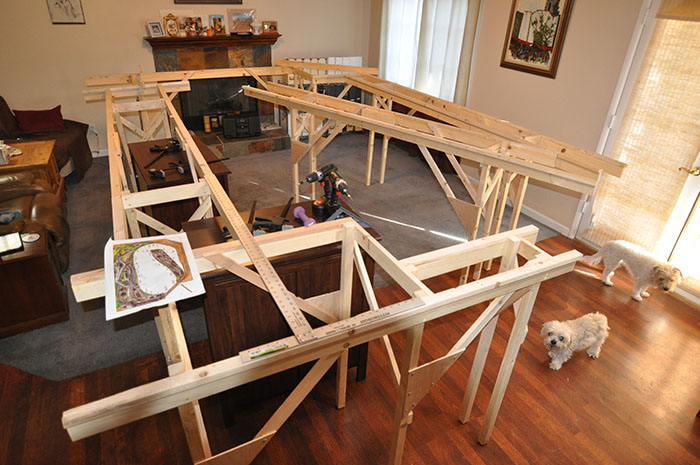
The outside L-girder framework is now complete. Time to shop for ½ ply and 1” foam. And of course, a bundle of 1 x 3 for joists. I hope to have at least the SP mail line loop running by the end of November. Those cabinets will be under the railroad and act as storage for locos and rolling stock.
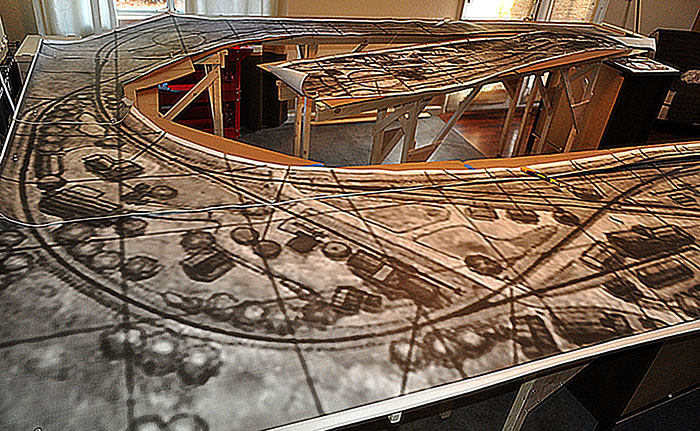
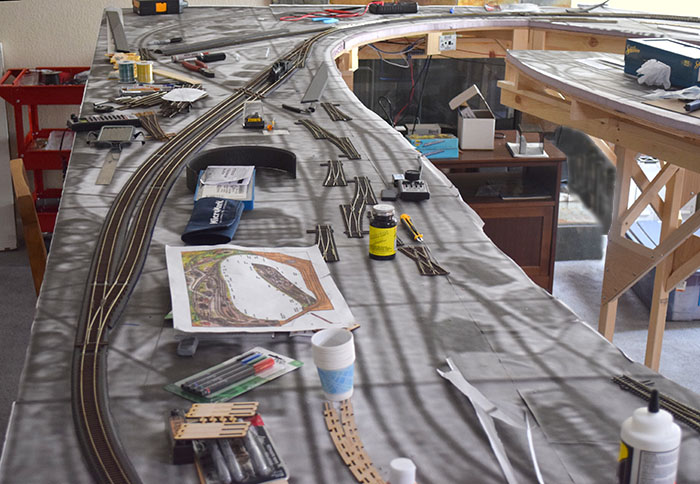
Sometimes it helps to reproduce the track plan on a larger scale to make sure you get some tricky track work and such placed accurately. I had this reproduced in 12" = 1'. Four 15' rolls of paper, with the image printed with a comfortable overlap, is helping fine tune the templates for the actual plywood and getting the curved table edges set properly too. Good thing we did this as one end was not measured or cut properly, and I see I need to redo at least one of the templates there. I also put significant fudge into the original templates and now that can be reduced greatly.
The prototype is C & NW near the Minnesota and North Dakota border. I moved it into the San Joaquin Valley north of Bakersfield and South of Tracy. The actual location is fictional, but there were a few short lines that interchanged along the route, so it is not too far removed from reality. The peninsula is one end of the branch line and the other side of the doughnut is the interchange with the SP. The branch will have minimum curves of 27" while the SP main has a minimum of 30". I'll finally have a place to run cab-forwards, mountains and the occasional GS-4, as well as 20 car freights.
Progress by 3/9/21 Trains are Running!
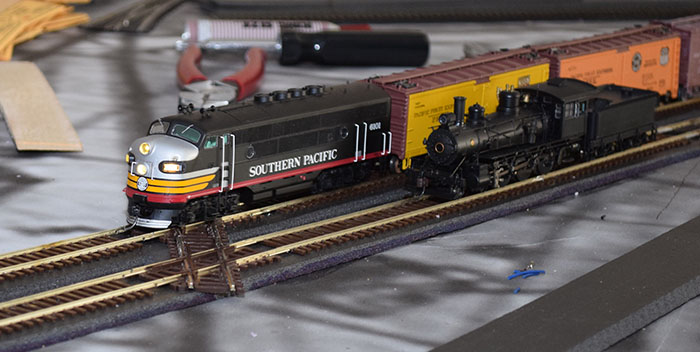
An F7 hitting the diamonds while a 10 wheeler is idling on the passing track:
The view of the junction from the west end:
 The overall view from the east end:
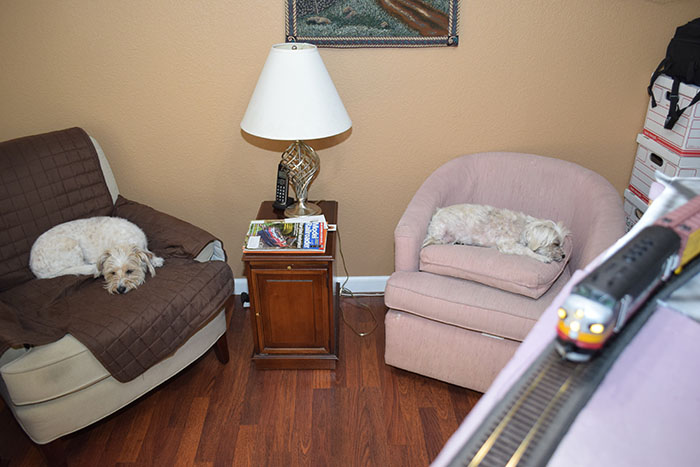
Here is the crew resting between runs:
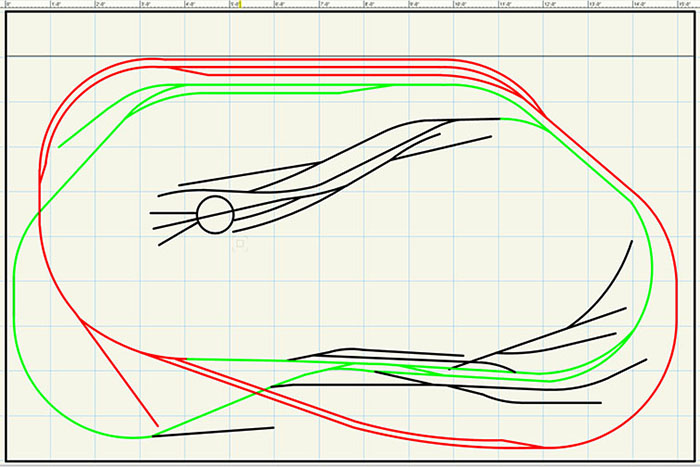 Vectorworks Drawing of the planed layout. The Red line is the main and the Green is the branch (where all the switching takes place). Branch line sidings are black.
The back side of the doughnut is actually a visible fiddle yard (this design is from a Brit you know). But I think it will keep me busy and maybe (when conditions permit) a couple other operators too.
Importantly the kitchen is adjacent to the railroad and there is almost always a cold brew available.
So long for now
Keith M
*****************************************************************
Looking at DCC Specialties PSX Solid State Circuit Breakers and Auto Reversers used on Paul's Layout.
*****************************************************************
The New Gon Ready for Work.
4/4/20 Report: Painting an SP Gondola
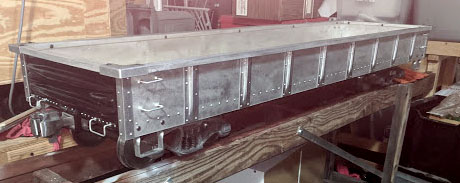
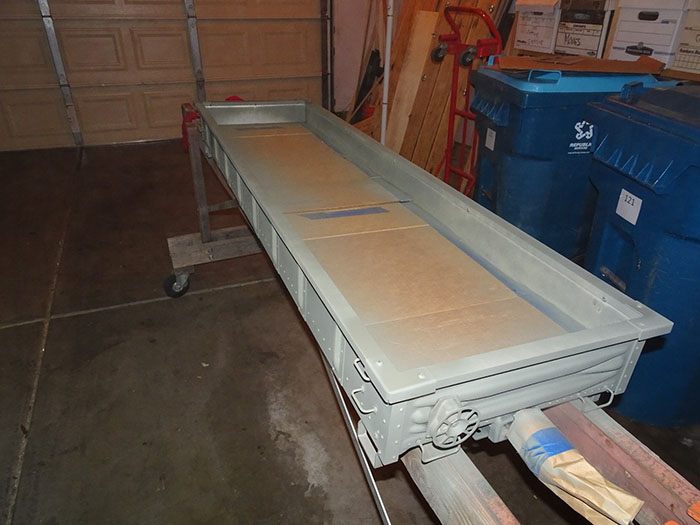
The new gondola was on a work stand in the garage. You may have seen a post of it a couple of weeks ago. This is a 1.6” scale model. That means a 40’ gon is 5 feet long, plus couplers. But it is made almost entirely out of aluminum and weighs about 100 lbs. on the rail. Not something you can drag to your spray booth, but it can be handled. Especially as the trucks weigh close to 50 lbs. on their own.
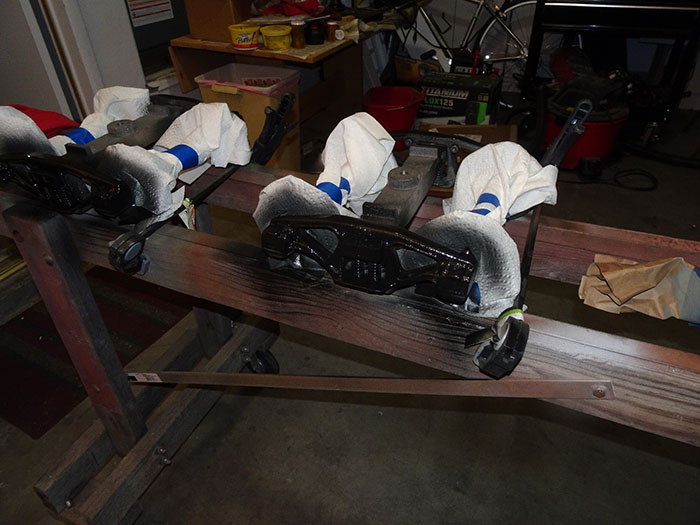
The first step is to get underneath and pull the pins holding the trucks, these used to be cotter pins, but today we use the safety clips that snap through the shaft and are much easier to fasten. Lift up the car body, the truck slides off and can be rolled out from underneath the car. I then invert the car body on the work rack (see figure 1).
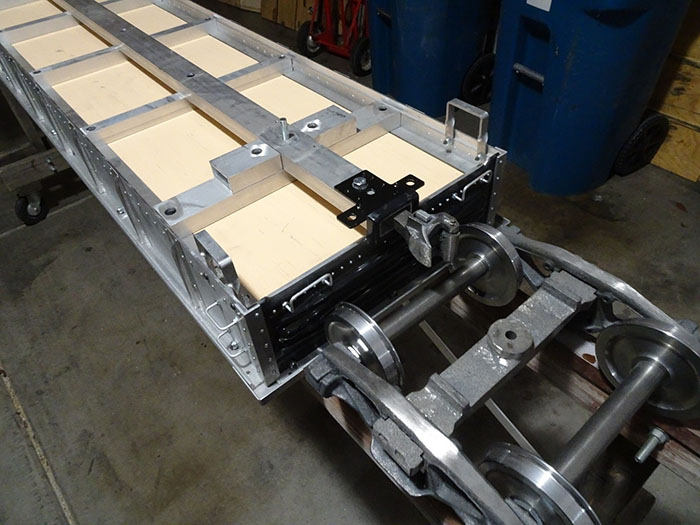
First, I took the trucks and stored them out of the away. Then I took a bucket of warm water with some dish soap (any grease cutting detergent) and washed the car sides and bottom. This just cleans any residual gunk from the building and shipping process. By the way the black pieces on the end are embossed plastic to emulate the waffle ends of the gon. They are attached to a flat aluminum plate for strength. As rule we don’t paint the couplers which are cast so they must be masked off. Here a grocery sack and painters tape do the trick (figure 2)
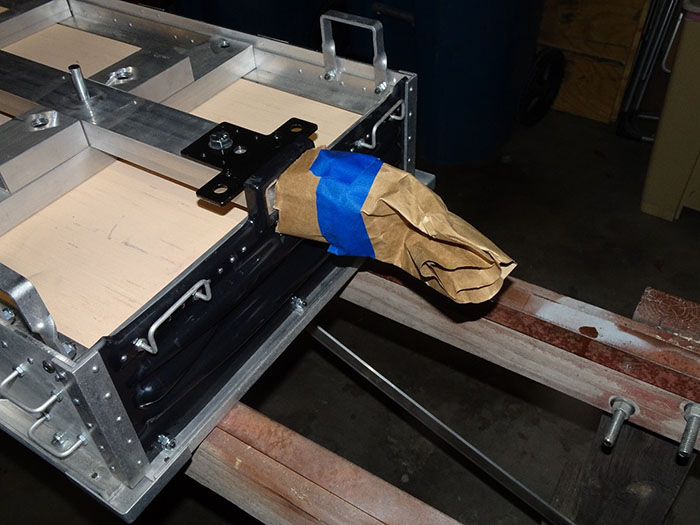
The kingpin on the bolster also needs to be covered. The rod needs to be clear and smooth for good operation. If paint got on it, it wouldn’t last too long if the car is used frequently, but it’s just as easy to protect it from the start (figure 3)
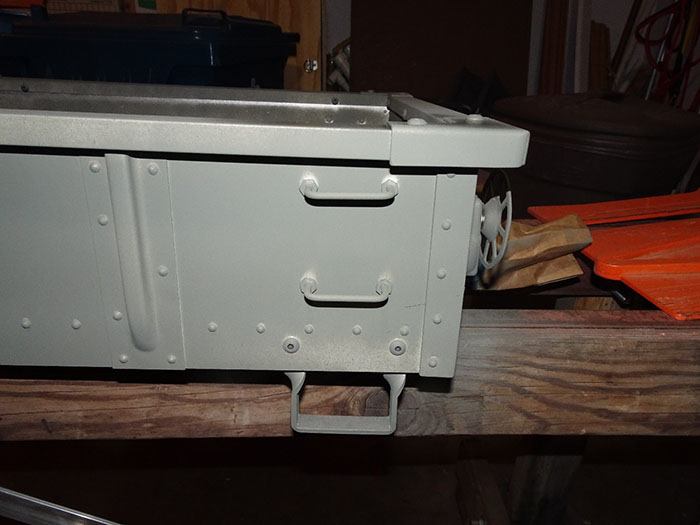
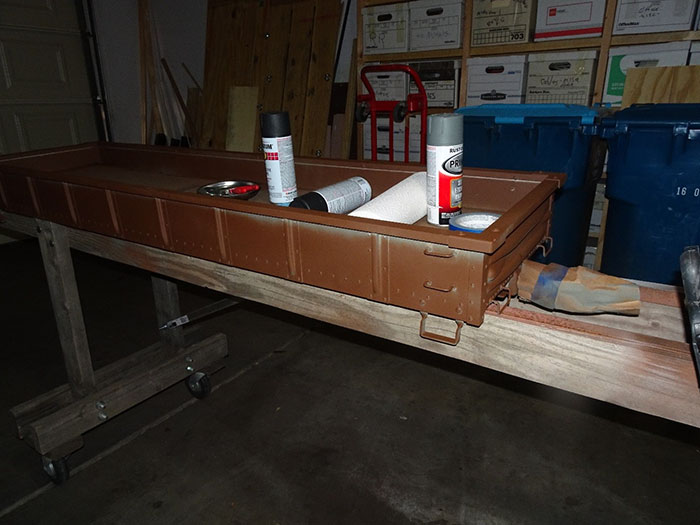
With the bottom and sides prepared, I was ready to paint. I used rattle can paints as the coarser pigments are not an issue with models of this scale. Primer was Rust-Oleum self-etching primer. The self-etching feature is a must with aluminum as the surface is quite smooth and offers little tooth for the paint to grab on. It is also important to do the sides carefully, especially in the edge lip as it won’t be too visible when the car is turned right side up and it isn’t a good idea to miss spots. After looking at primer after it dried, using a bright flashlight, I touched up a few spots that seemed to lacking. With that second coat dry I turned the body over. I washed down the inside and top rail just like before. Before starting the painting I wanted to mask the floor. The floor is plywood and I plan on using a grey stain to make it look somewhat used and old. Some carboard was just about the right size, so a few swipes with a box cutter and more painters tape, the floor was protected and I could start priming. Here’s what it looked like after the first pass (figure 4).
Even in this picture you can see some spots that aren’t covered too well, so a second coat was done. The handrails, steps and brake wheel need some special attention to make sure that all sides, top and bottom are covered. (figure 5)
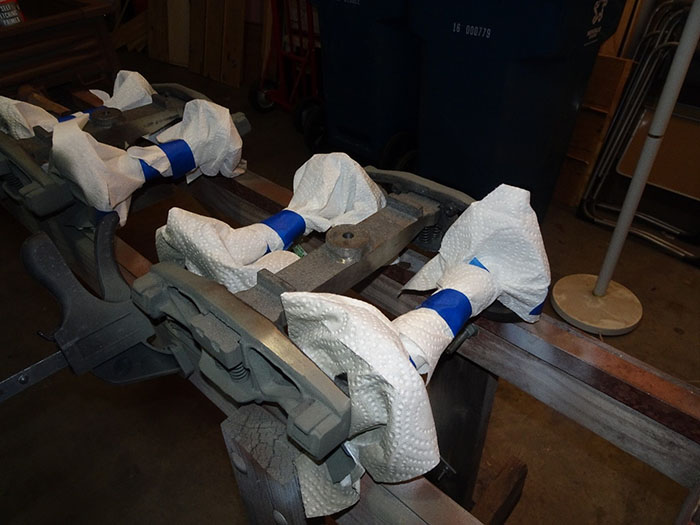
With the car body primed and ready for paint, it was time to focus on the trucks. I put them on the work rack and proceeded to mask the wheels and axels. The axels aren’t too important as they really don’t get seen. Priming the side frames, from the top and the bottom are the secrets here. (figure 6)
Once the primer was dry, it was a quick job to cover the side frames with flat black, again shooting up from below as well as from the top down. (figure 7)
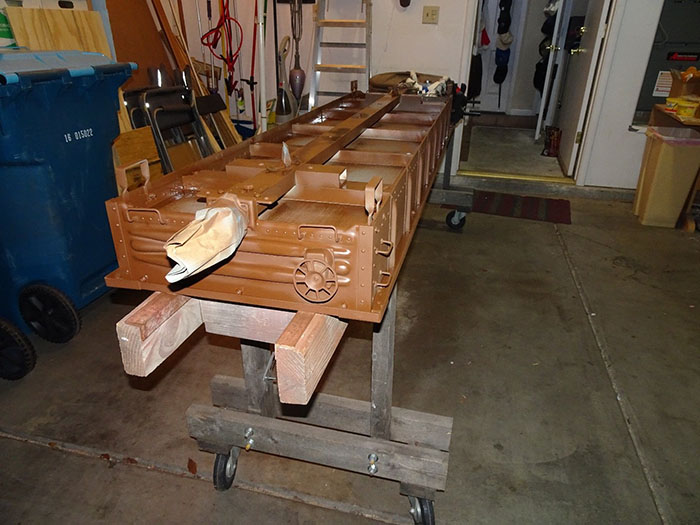
Now with the car body still right side up I grabbed the brown spray cans started painting. The insides, ends and outsides all got attention. You can see in this shot that most of my painting was from above, although I did get a bit lower on the second pass. (figure 8)
After hitting spots that needed a bit of touch up, the car was turned over once again. And painting resumed. I didn’t care if the floor got well covered or not, if you could see it, then something much more important was going on than evaluating my paint job. I did want to get most of the exposed aluminum covered and to shoot paint down into the edge lip. All in all it went well. (figure 9)
After that paint dried, I turned the body right side up, took out the cardboard protecting the floor and got ready to drop it back on the trucks. I little grease on the kingpin and the fender washer on the top of the truck bolster and I dropped each end of the gon onto its wheels. Not quite ready to go, but looking okay. (figure 10)
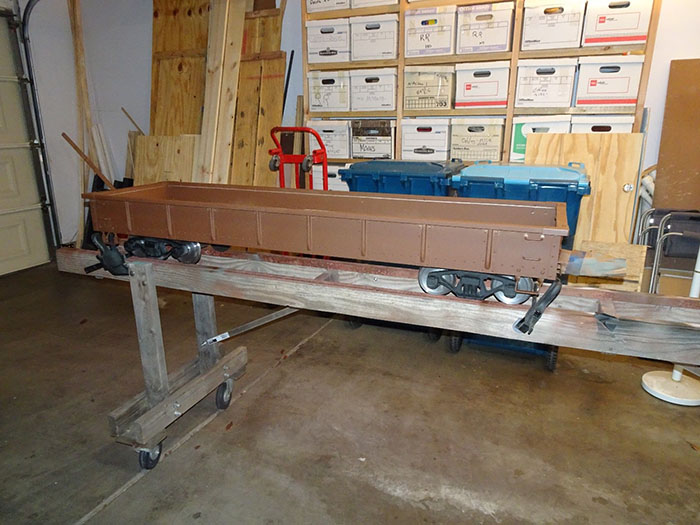
Now I hit my first snag. Most live steam folks get their decals (actually more like vinyl stickers) from a wonderful source Miracle Graphics, and I order a set for an SP gon. I remembered to specify the length (this gon is available in 5 foot as well as 6 foot), but I didn’t mention that it was a very low side car. This is because this is my driver’s car. I’ll put a seat or two in the car for an engineer and conductor, so I got the lowest sides available to make it easier to get in and out. Well this is non-standard and I got the letters for a normal size gon which is about 3” higher. (figure 11)
Entirely my error, so I’ll put these graphics aside for a regular gon that I’ll be ordering some day and reorder the graphics for the low sided gon with a different road number. You can see that 3 inches would have made the difference in the above photo. The paint job went well and I’m pleased with result. The 1.6” scale engine is on order, but as all these size engines are built to order, just like the prototype I have to wait, until fall 2021. But I have plans to build an SP caboose that should occupy a chunk of time over the next 6 or 9 months and there is always an HO project or two that needs to be done. Until next time Happy Modeling!
******************************************************************
Keith's Report 3/24/20
The major project so far is research. I’ve got the Model Railroader DVD with the first 75 years of MR. 1934 – 2009. I’ve been digging through it for structure articles to help build up my scratch building skill set. The 30’s and 40’s are pretty slim pickings. Most of the articles during those decades were focused on just getting trains to run and where to run them. That focus, plus the scarcity of materials (depression, WWII) didn’t offer much for my goals. The 50’s on however are proving fertile ground.
Do any of you remember authors like Jack Work or E. L. Moore. They had several articles with lengthy descriptions of processes they used with paper and wood to create some nice looking structures. I also saw some early writings from a guy living south of San Francisco named John Allen and his early work.
The biggest surprise so far was an article in September 1959, by William E. Eckhardt about using laminated sheets of Styrofoam to make scenery. And you though using foam insulation was a new thing. He describes both white and the heavier blue, green and other colored types. Eckhardt describes layering up the foam, carving basic contours and then applying a thin coat of plaster and paints to finish it. This was over 60 years ago.
I also ran into a two part series by Alan B. Ar mitage titled “The case for styrene”. This was in November and December of 1959. Before this most scratch building was in paper, wood or metal. Alan makes the case that styrene can do it all and over the next many years he proves his case with some wonderful modeling and construction articles in MR.
In my research I’m up to 1976 and going strong. Quite a stack of articles to pick through. After I pick one or two smaller projects, I’ll be showing you the progress with an occasional photo and written update. Until then pay attention to the signals and stay healthy.
Keith McMillen
The Great Depot Hunt
By Keith G. McMillen, TLMRC (Click Here)
Brick Work
Keith Mc Millen's Brick Work (Click Here)
More to come
Keith Mc Millen pulls a 17 car train "The Utah" up Ted York's Cajon Pass layout with helper loco operated by Paul Wussow during the NMRA National Convention " Salt Lake City 2019".
 Keith heads downhill after reaching Summit.
After running the wye at Summit Paul waits for clearance to go back down to San Bernardino.
Join us in the “Greatest Hobby” as a member of the TLMRC.